How to turn photos of Aphrodite into a 3D-printed model
Concept
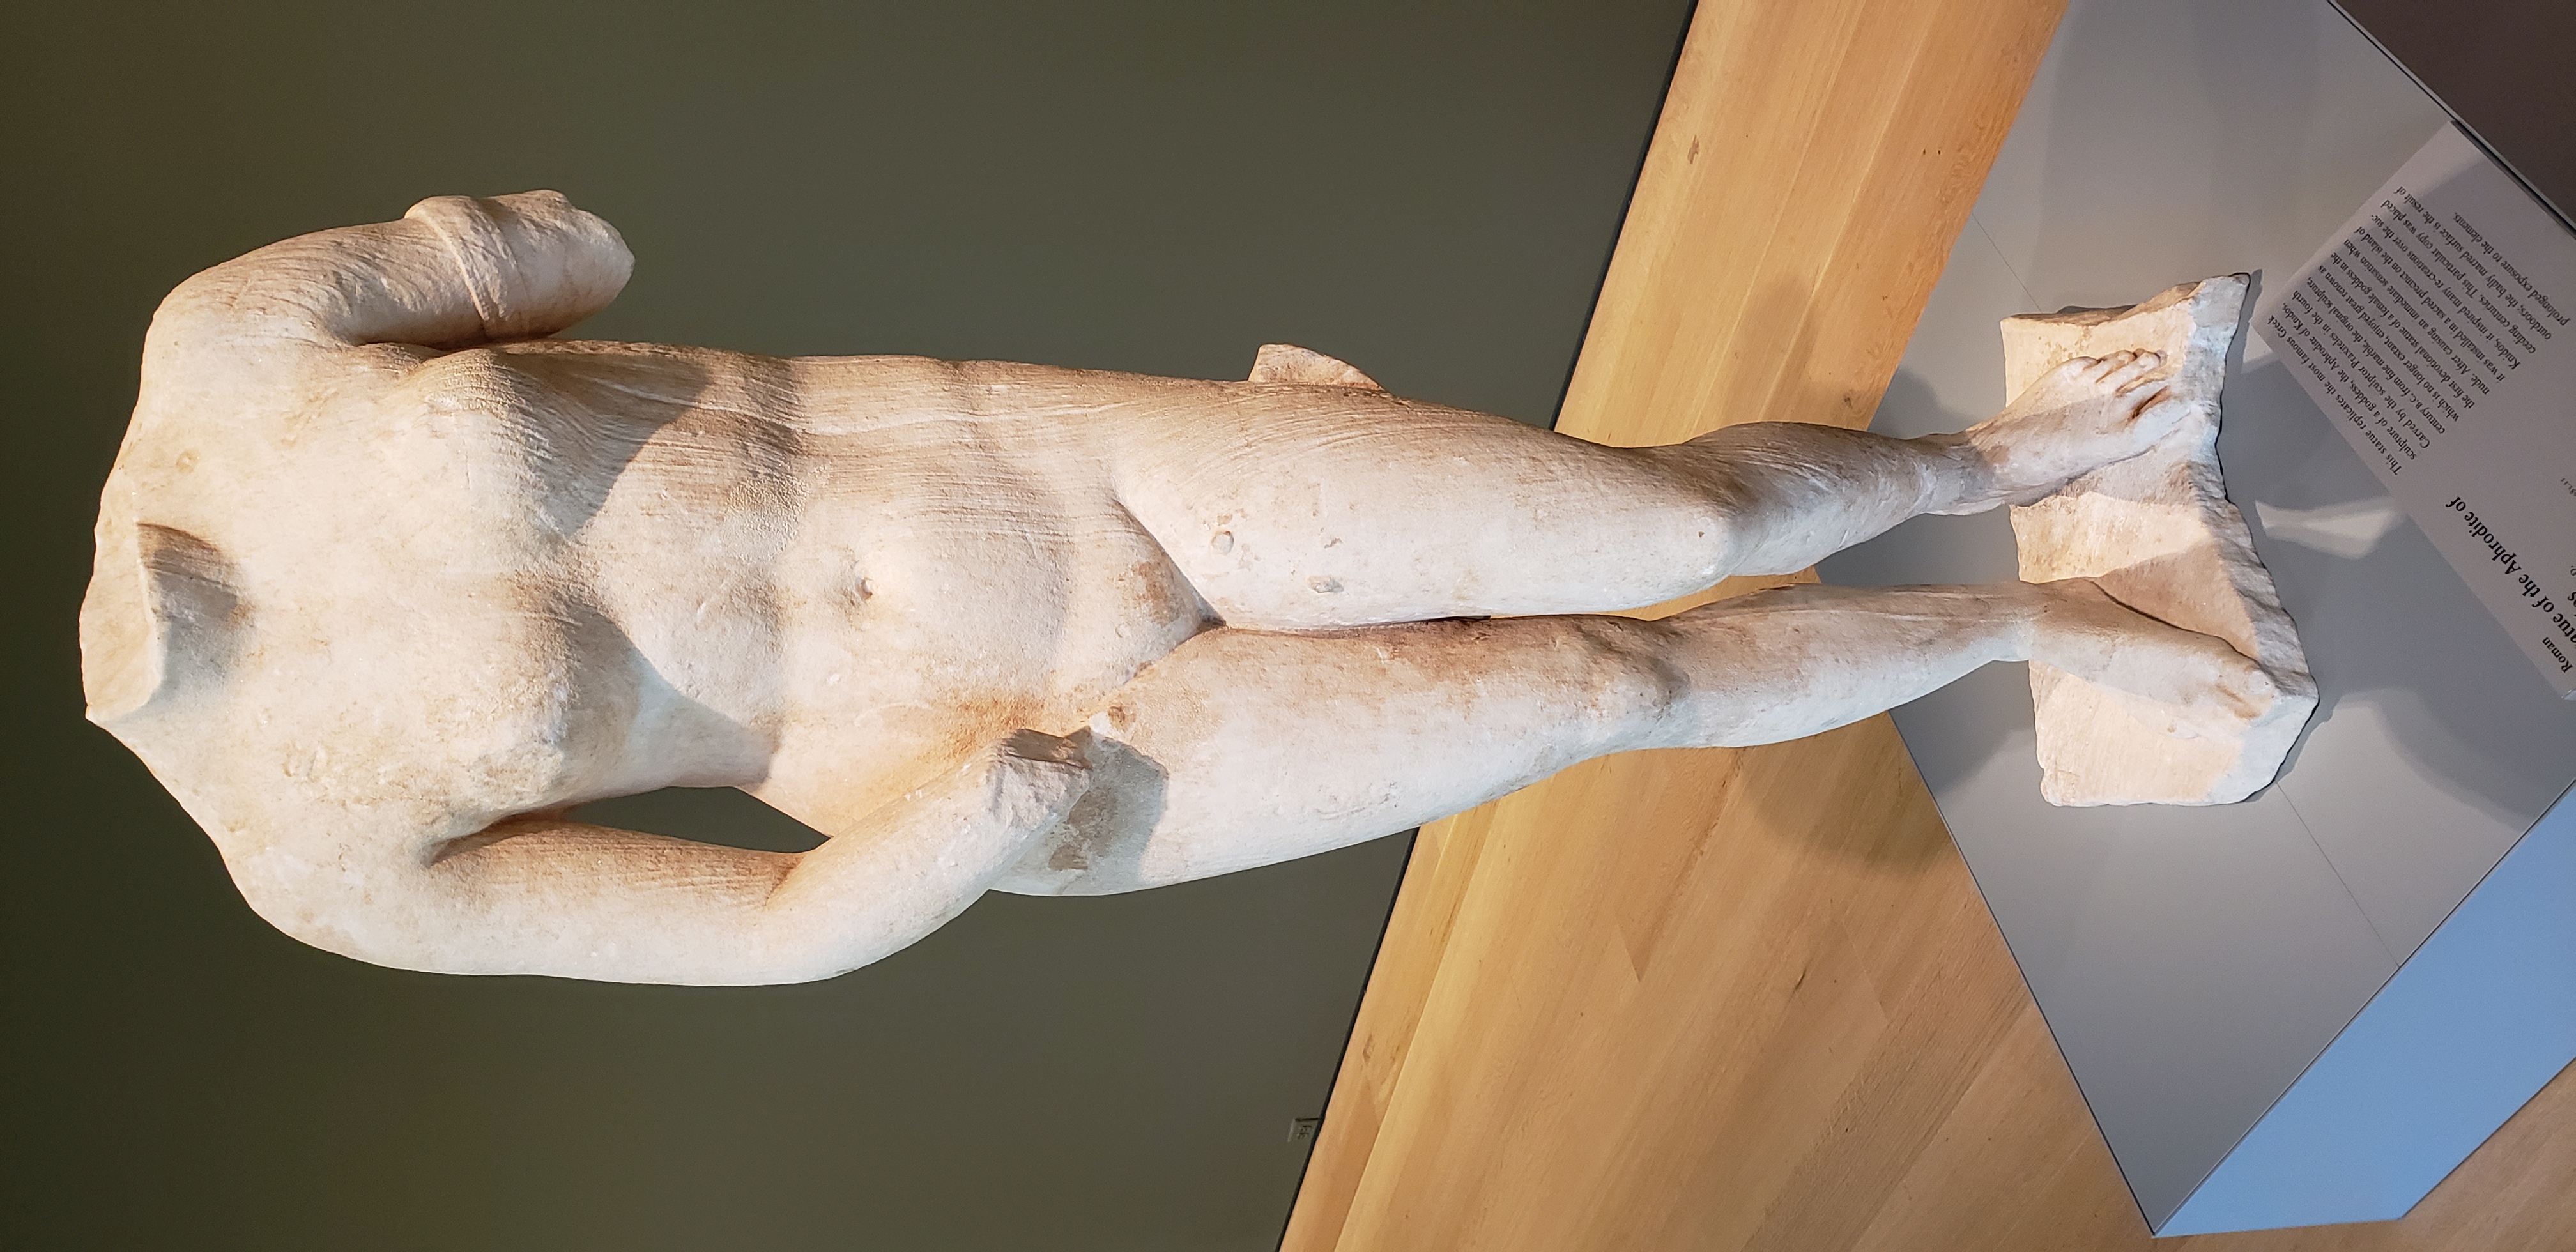
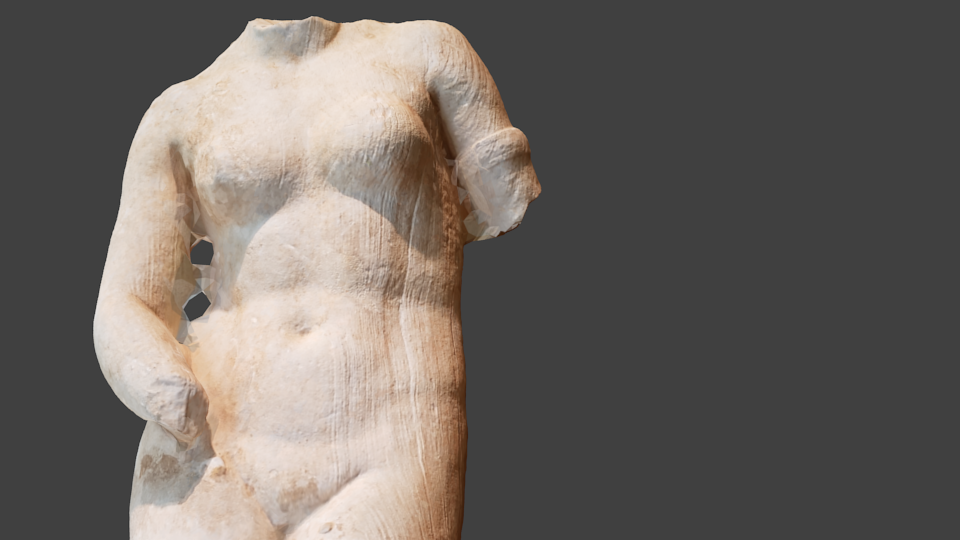
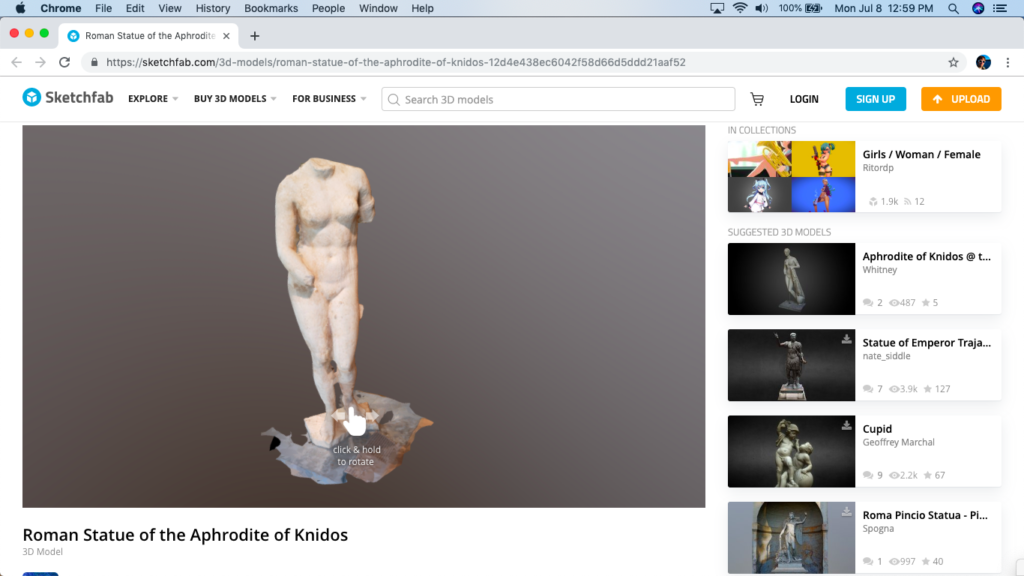
Let’s make a 3D print of something from the Art Institute of Chicago! I thought it would be neat to try to print something from the Art Institute, so, as I was perusing the collection I had my eye out for a worthwhile specimen. I eventually happened on ‘Statue of the Aphrodite of Knidos’ and realized that the sculpture would make a great photogrammetry example. This particular form has a wikipedia article about it.
The Art Institute has a great collection of ancient Greek and Roman art, and if you’re ever in town I suggest taking a look.
Materials & Tools
What hardware and software will it take to turn an actual physical statue into a 3D print?
Hardware
- Desktop computer
- Cell phone camera
- Optional: Selfie stick with remote shutter control
- PRUSA i3 MK3 3D printer – or other consumer 3D printer & 3D printing filament
Software Tools
- Meshroom – https://alicevision.github.io/#meshroom
- MeshLab – http://www.meshlab.net/
- Blender – https://www.blender.org/
- Slic3r – https://slic3r.org/
Demo Media
- Photos – download here
History
I have previously worked with photogrammetry for a few different purposes including documenting spaces, artistic experimentation, and model creation. Before starting I had the basic idea of photogrammetry down – take some pictures and use some software to match them and build a 3D Model. I also have been experimenting with 3D printing since getting my printer in November of 2018.
Selecting a model
The Aphrodite sculpture is a pretty great subject for a photogrammetry example.
- It is conveniently located all by itself which allows easy photography from every side from multiple distances and it is short enough that I can easily take pictures from overhead angles while standing. It is easy to get the statue to take up the full frame of the camera and be in focus.
- It is well lit during museum hours. Good lighting helps ensure that your camera can easily pick up details. Low lighting will force your camera to increase the ISO, which will lead to more noise in the images, increase the exposure time, which can contribute to unintentional motion blur and decrease the f-stop which can cause depth of field blur. Because we need as much detail and focus as possible, good lighting is critical!
- The surface of the sculpture is well-textured. The weather corrosion from centuries of being outdoors naturally provides photogrammetry algorithms with many ‘features’ to pick out. Plain surfaces (including freshly carved white marble) can be very tricky for these algorithms to reinterpret three dimensionally.
- The even lighting all around the statue (mostly) prevents the camera from automatically adjusting the brightness too much. When a camera has to reconfigure excessively for lighting conditions sometimes features can become too dark or too bright in specific photos to be picked out without further adjustment, and the computed texture map can have oddities and artifacts.
- The corroded surface isn’t mirrored or glossy. Mirrors, polished surfaces, and glossiness can cause unpredictable abnormalities in the reconstruction. Translucent, reflective glass might be the most difficult subject to automatically reconstruct with photogrammetry!
Taking the Pictures
I think it can be really fun to take a bunch of pictures of the same subject from different angles. One nice thing about it is that when you get good coverage of your subject – you get all of the angles – without trying I guarantee you that you will end up with some really great shots without even being conscious that such great angles exist! There have been so many times when I have been circling a subject and suddenly did a double take when looking through the camera at a beautiful angle I wouldn’t have otherwise considered.
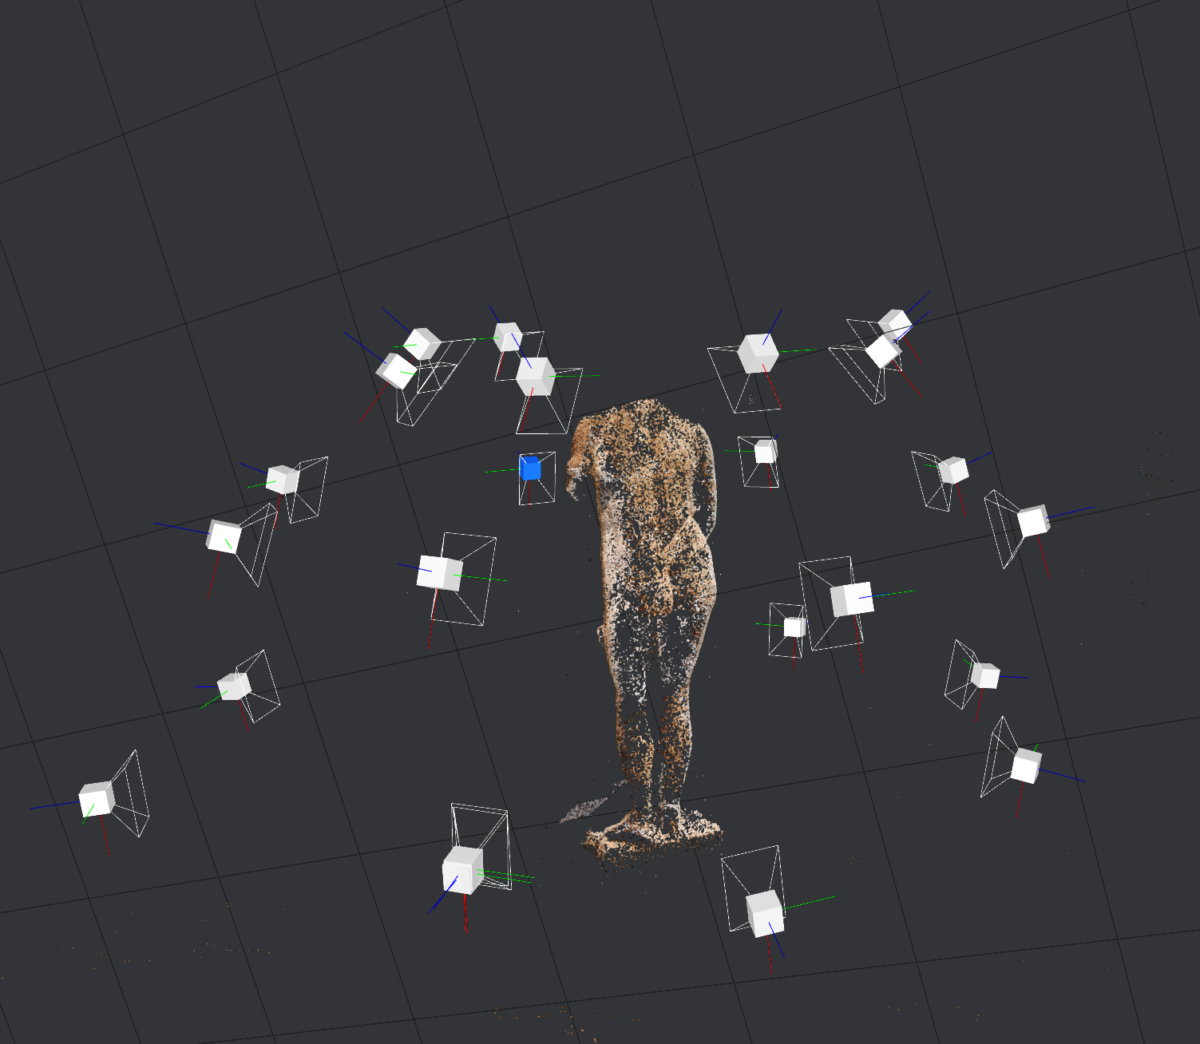
As a rule of thumb, I like to take at least 52 photos of each subject. Where does that number come from?
3 different heights (high, medium, and low) x 16 different angles (for each height) + 4 cardinal angle distance shots = 52 total photos
Fifty Two photos is a lot of photos for a single subject, and that is by no means always enough. With highly detailed subjects, and for subjects with gaps or holes 52 is probably nowhere near enough.
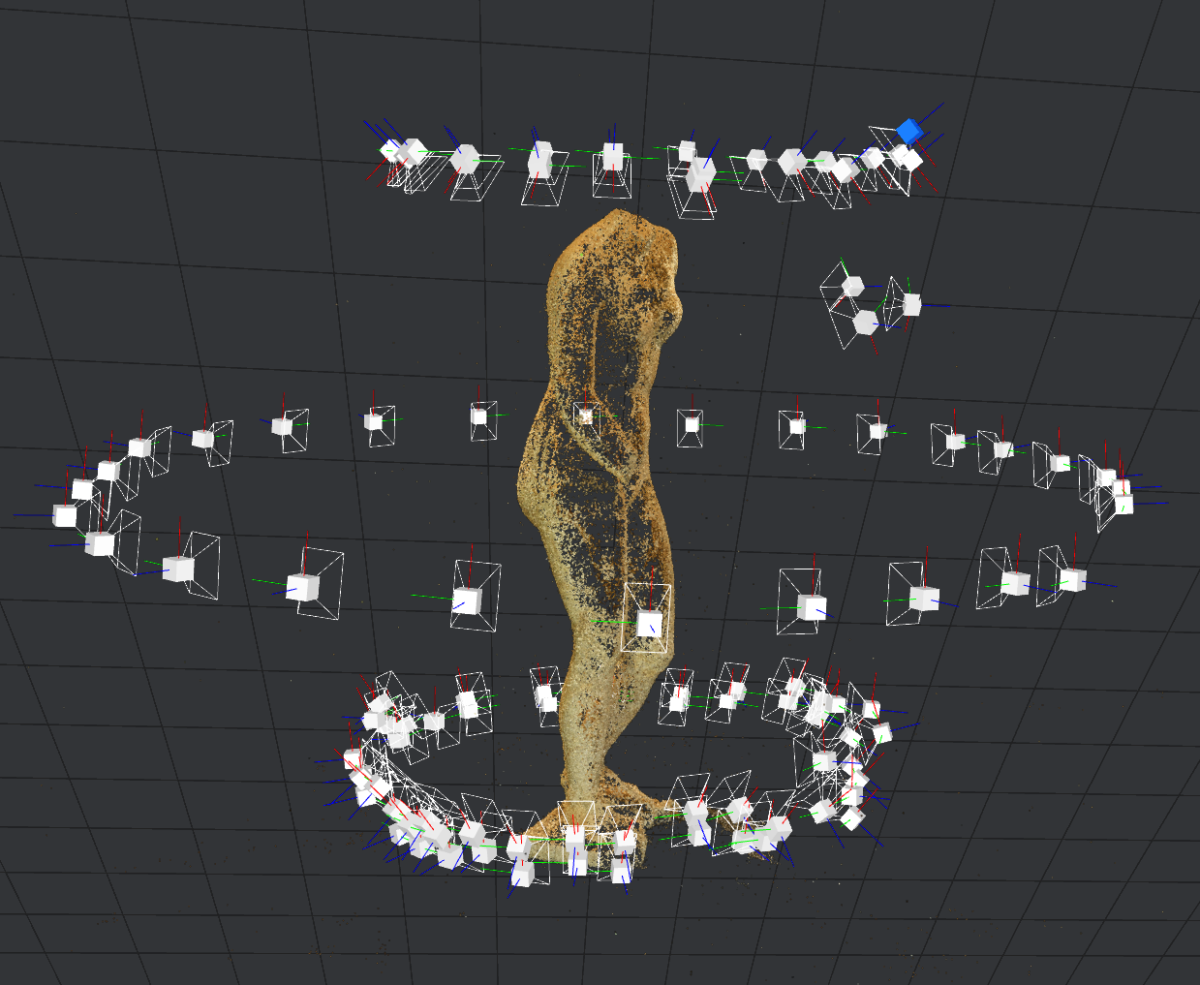
As you can imagine, it can be quite difficult to get photos from way up high or around the back; this is where the selfie sticks I mentioned in the materials section can come in handy. They also can be used to get around the backs of sculptures that are too close to walls to walk around.
My experience in museums has been that when I get up close and take 50+ photos of a work other attendees take more notice of whatever I am shooting. Museum guards often warn me to back off. When taking so many photos in high traffic areas I like to be conscientious of other folks and take breaks so that they can take pictures of the subject that don’t contain me.
Files!
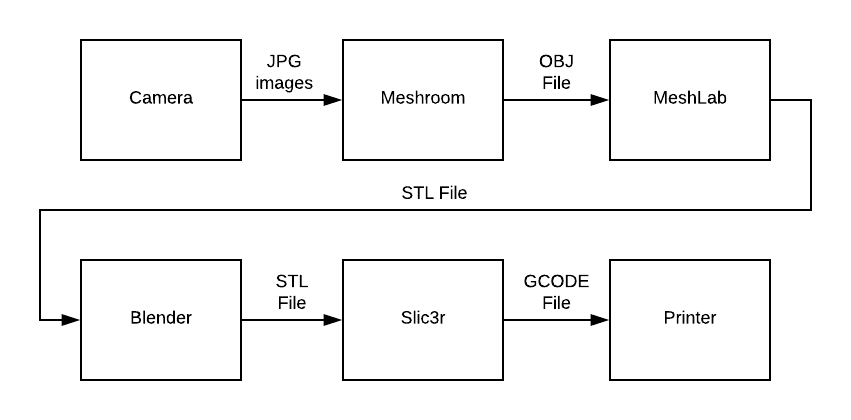
Ok, now that you have your photos what do we do with them? Let’s take a look at the process flow:
With this in mind I like to keep my workspace nice and clean by structuring my project files as follows:
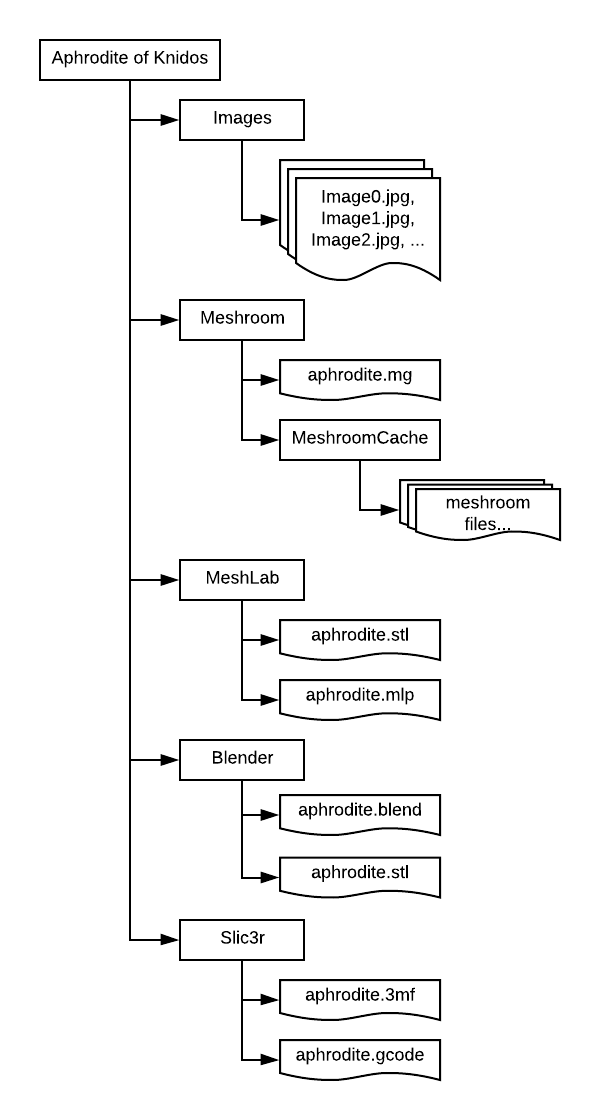
- Aphrodite of Knidos/
- Images/
- All of the images of the subject go here
- Meshroom/
- Save the Meshroom project inside this folder
- MeshLab/
- All outputs from MeshLab should be saved in here – trimmed/remeshed meshes
- Blender/
- All Blender project and model outputs should be saved here
- Slic3rAll/
- Slic3r outputs should be saved here – Slic3r project files and .gcode files
- Images/
Get started!
- Create a base ‘Aphrodite of Knidos’ folder.
- Next we will want to make our ‘images’ folder and move all of the subject photos there.
- Then make a ‘Meshroom’ folder where we will save the Meshroom project.
- Launch Meshroom.
To import the images into the project drag the ‘images’ folder into the Images pane on the left hand side of the Meshroom window. Next save the project into the Meshroom folder. At this point if you want to make some advanced changes you could alter some settings but for the basic flow all you need to do is hit the ‘start’ button!
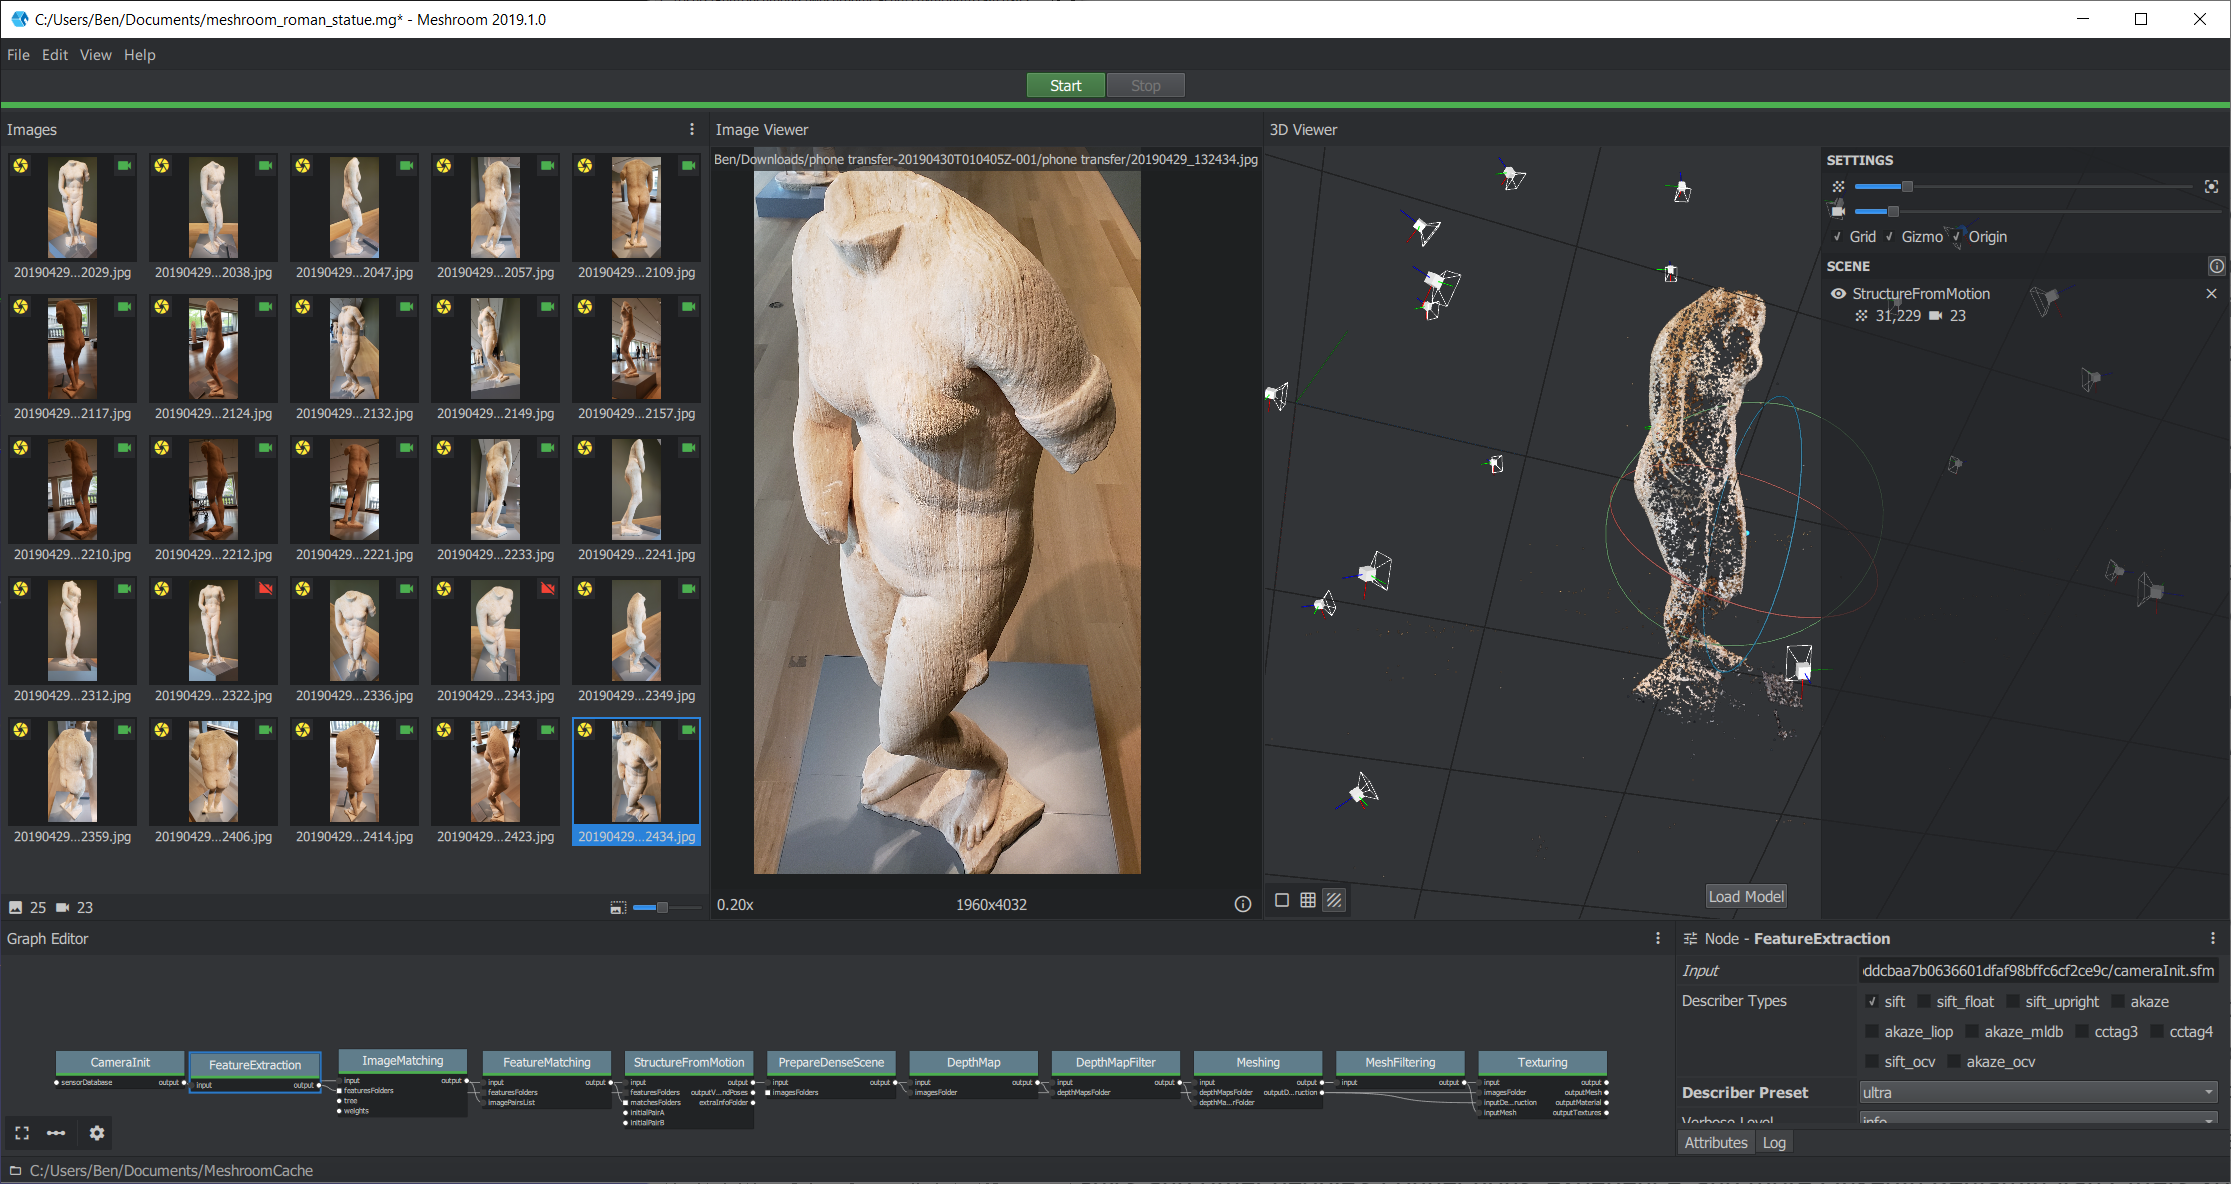
Once the process completes, and it might take quite a while, right-click on the ‘Texturing’ Node in the ‘Graph Editor’ pane and choose ‘open folder’. In this folder is your auto-magic OBJ file!
If you want more detailed models one of the first steps to take is to ratchet up the ‘Describer Preset’ in the ‘Feature Extraction’ node in the Graph Editor pane.
Another pro-tip: If all you are doing is using the model output for printing then you probably won’t need the texture that is computed during the processing. To remove the texturing step you can delete the final ‘Texturing’ node in the Graph Editor.
Basic Clean Up
There are several clean up operations that you might want to do after Meshroom is finished building your mesh:
- Crop the scene down to your intended subject
- Reduce the number of polygons
- Position, scale, and rotate the mesh
For numbers 1 & 2 above, I like to use MeshLab.
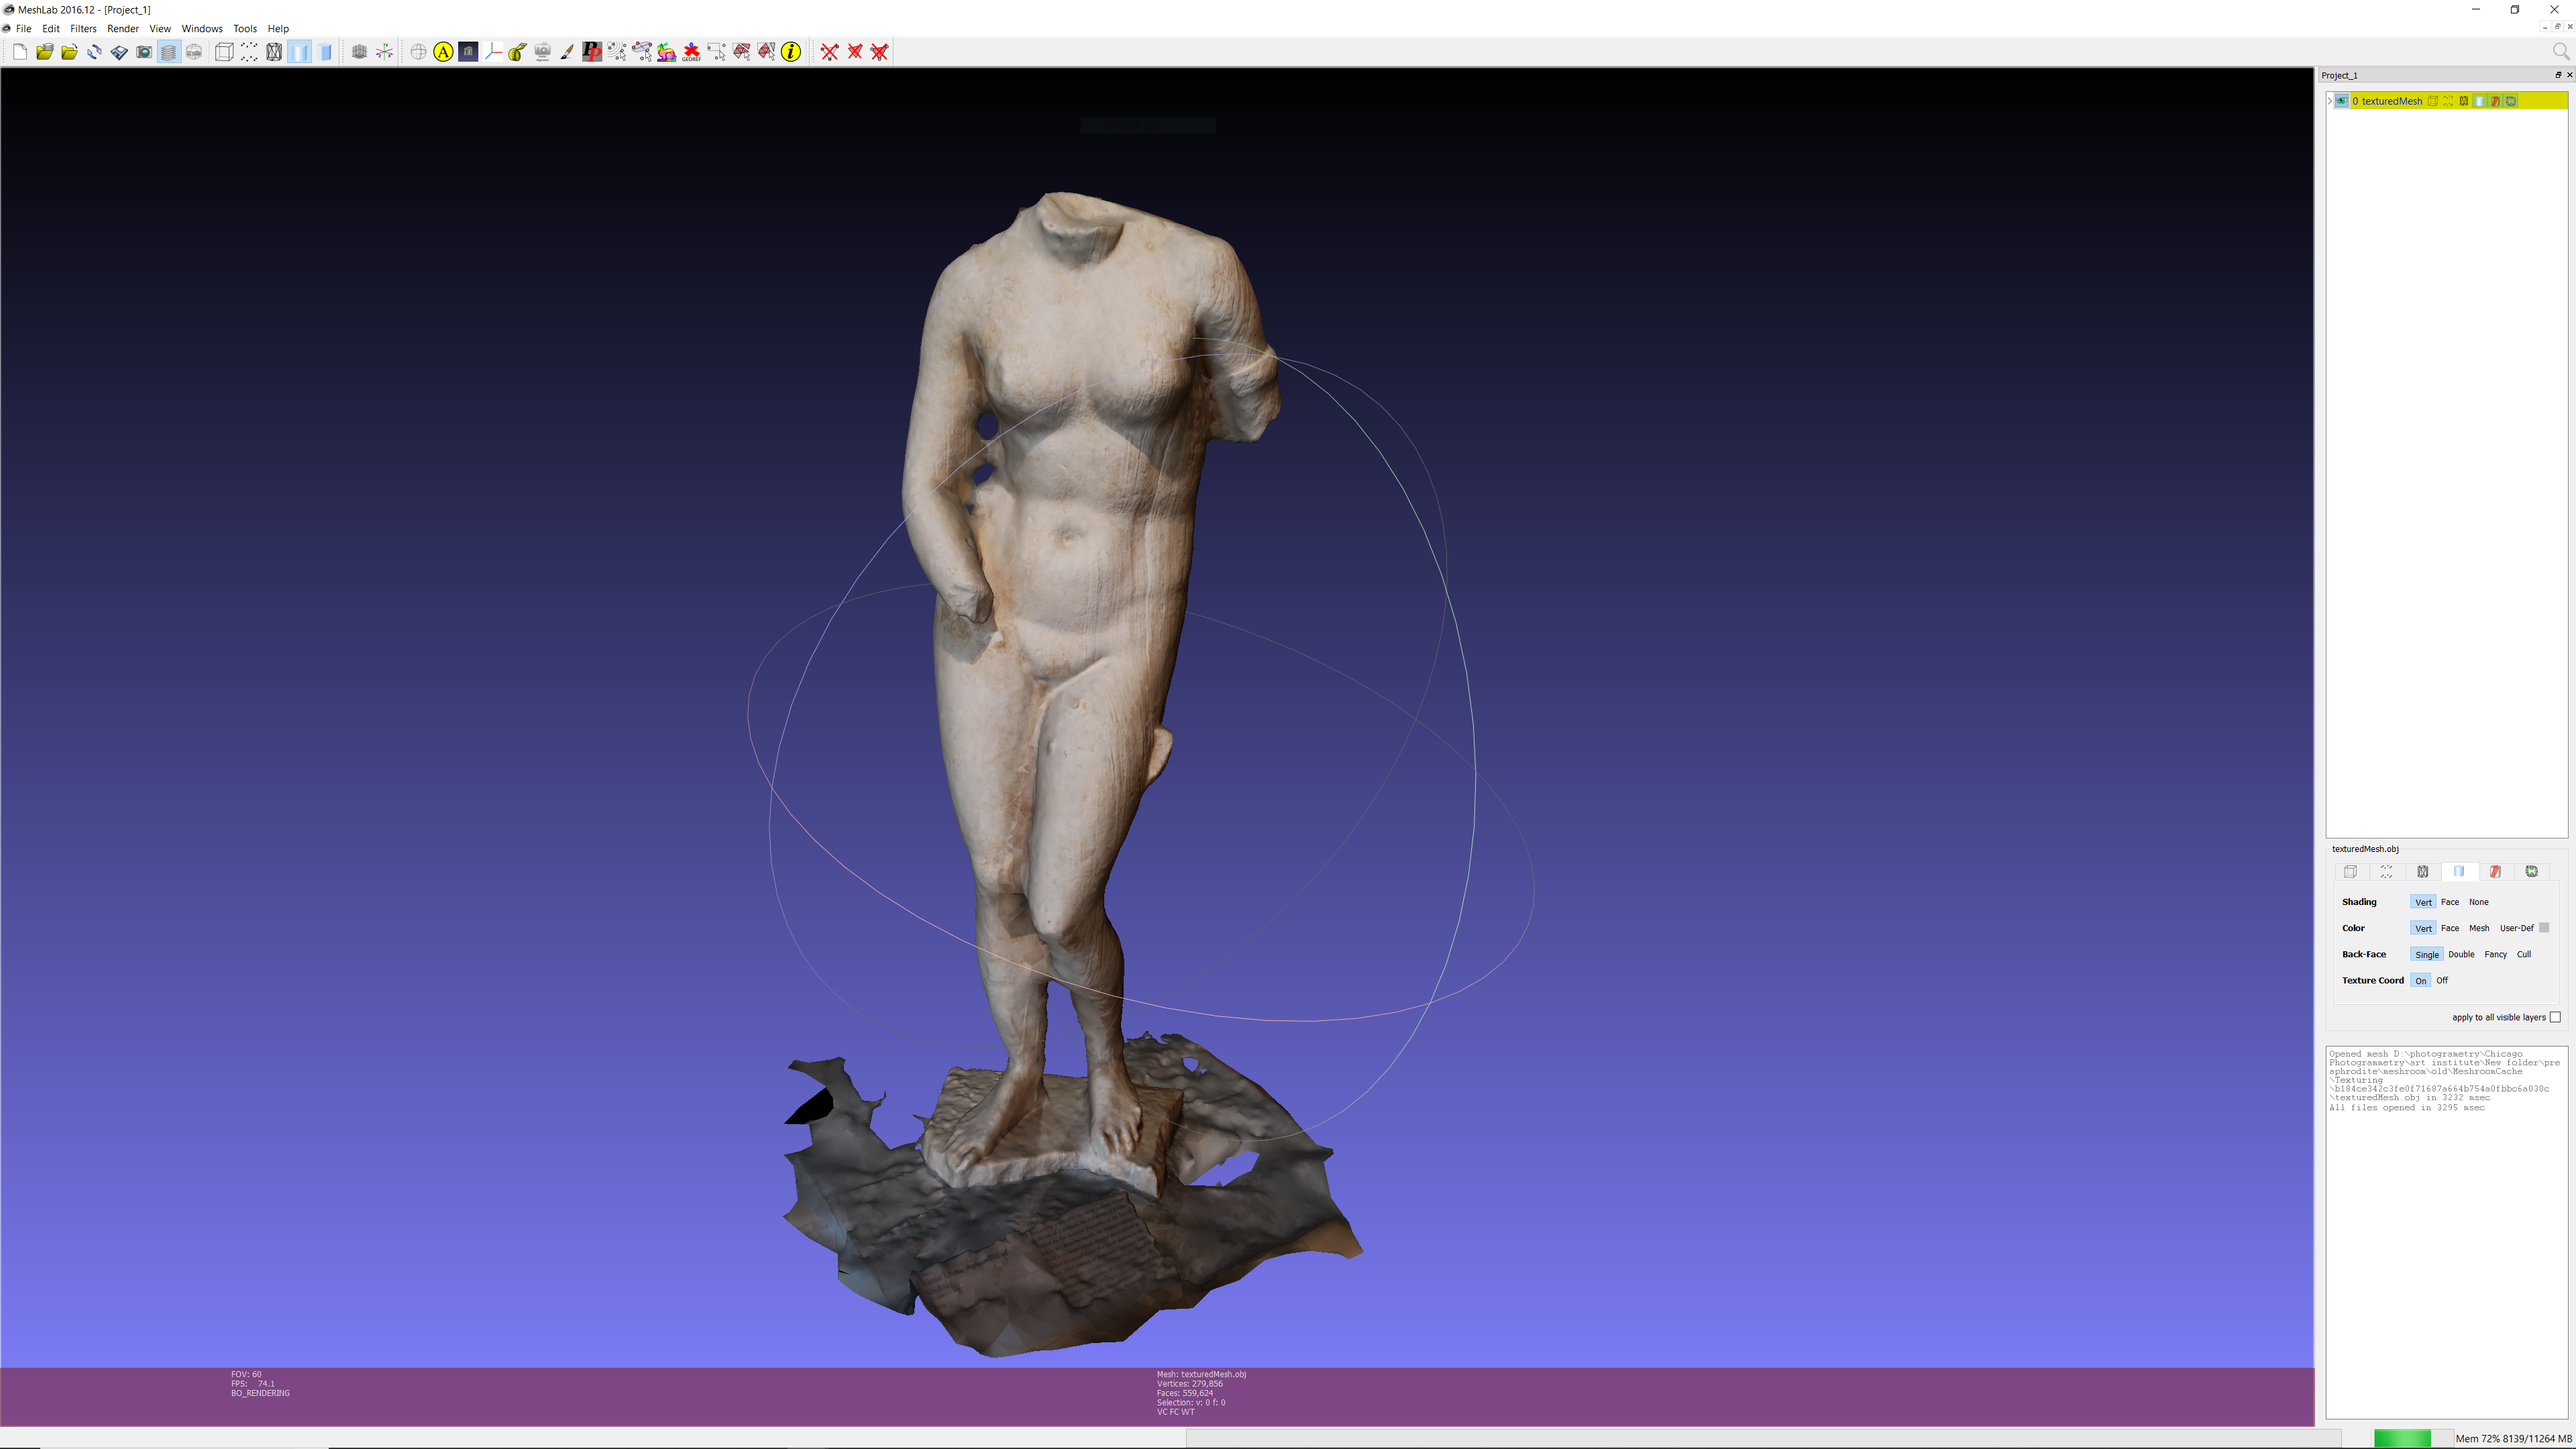
Before getting started you will need to import the OBJ file from Meshroom into MeshLab . If you follow my folder structuring then the OBJ file will be located at
'Aphrodite of Knidos /Meshroom/MeshroomCache/Texturing/..long hash../'
After the model is loaded you can use the ‘Select Vertexes’ / ‘Delete Vertices’ functions to remove unwanted points and triangles.
For printing and further editing it is generally a good idea to simplify the model somewhat. this action will reduce load and processing times at every subsequent step. I like to use MeshLab’s built-in menu function, ‘Filters / Remeshing Simplification and Reconstruction/ Simplification Quadric Edge Collapse Decimation’ which will give you a dialog box allowing you to decide how many faces you would like the simplified mesh to have. This operation will ‘remesh’ the model, reducing the total vertices, while algorithmically keeping the same approximate shape.
Once you are done with that we want to export the remeshed/cropped mesh as an ‘.STL’ (stereolithography) file. Export into a new ‘MeshLab’ folder under our project folder.
For number 3 above, my favorite free tool to rotate and position the mesh is Blender. Open up Blender and delete the default light, cube and camera. Next, import the .STL file from the last step. No we want to rotate and position the model to be standing straight up right on top of the origin point. This can be done either with the graphical widgets or by entering values into the text boxes under the ‘object properties’ tab.

When that is completed make a new ‘Blender’ folder in the project folder then export an .STL and save the Blender project there.

I can’t cover re-texturing, hole filling, or other re-modeling and clean-up here as they are more advanced than space allows.
Printing
Caveat: The intricacies of 3D Printing are an extremely deep topic, so I can’t go over the details such as filaments, hot ends, supports, or layers here. There are lots of online and printed material on this topic available.
In order to ‘slice’ the model into ‘gcode’ that the printer can use we will use Slic3r. Open up Slic3r and import the STL from the last step in our ‘Blender’ folder. Hopefully you were able to get the model to be vertically oriented in Blender, which has easier tools for placement and scaling, but if not use the widgets in Slic3r to scale the model to the desired size and orient the model vertically. Once everything is correct make a ‘Slic3r’ folder under the project folder and save the Slic3r project there. Next slice the model and then save out the gcode to the ‘Slic3r’ folder.
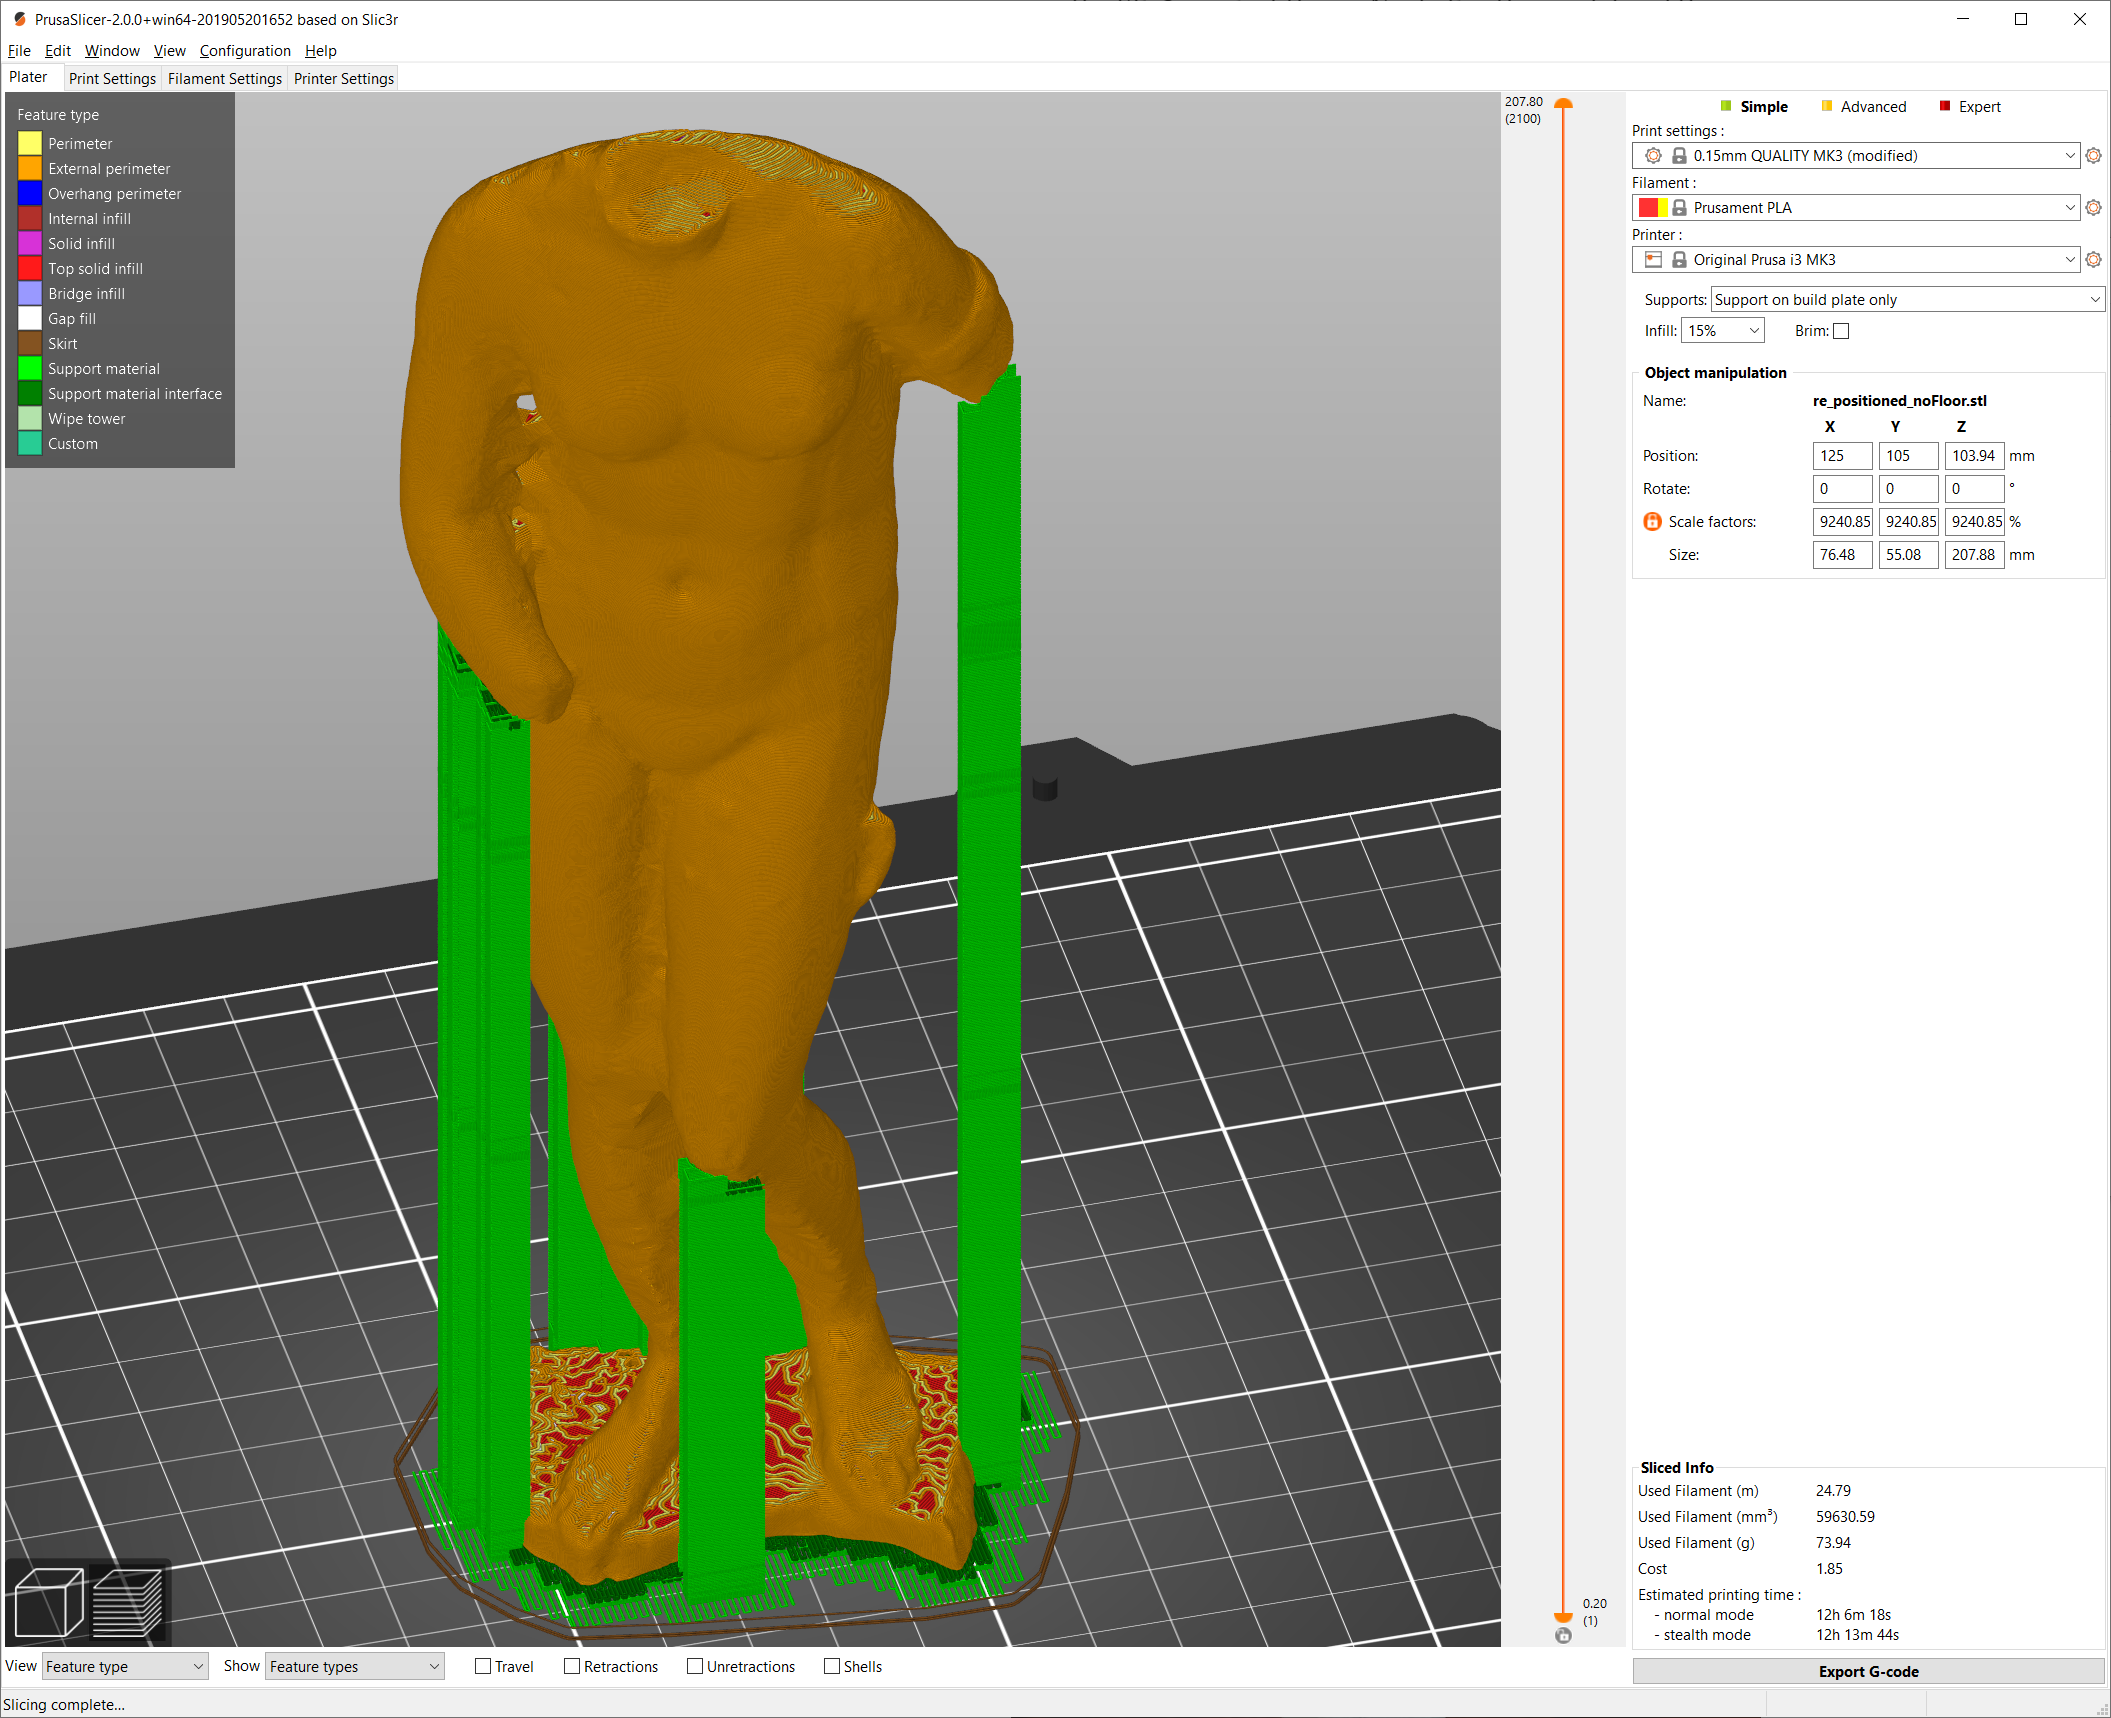
How you get the gcode to start printing will vary depending on the printer you are using. In my case, for my stock Prusa i3 MK3, I save the gcode file onto an SD card and then stick that into my printer. Next I use the printer screen and dial to start the print.
From here all I need to do is choose the model to print and then let it go!
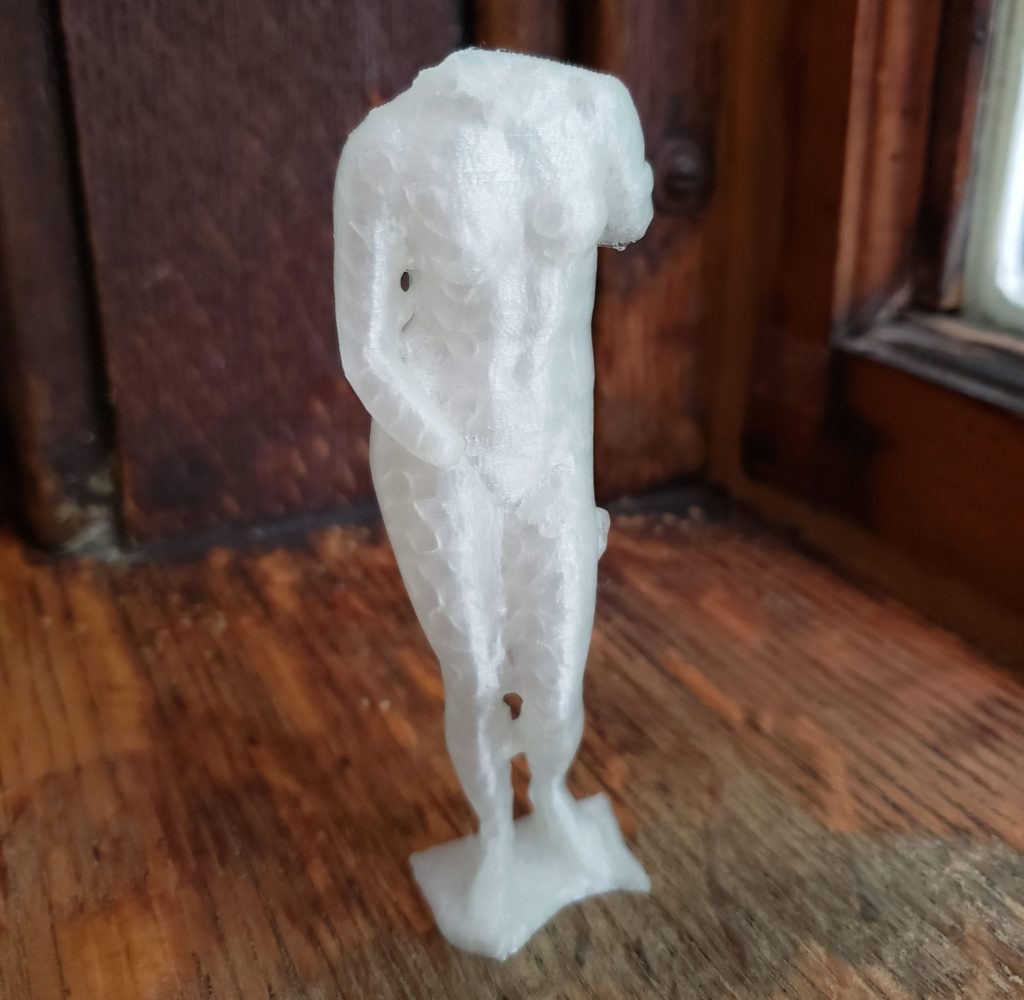
Results
Bonus points:
Okay, I hope that you were able to get this far. But maybe you want to do more, maybe you want to put your model on the internet! I recommend Sketchfab for hosting your 3D/STL files online. It has some nice features such as free sign-up, allowing different attribution licenses, and facilitating paid models. There are other options too of course, such as thingiverse, myminifactory, and prusaprinters.
Sketchfab – https://skfb.ly/6JYqYAuthor Benjamin Van CittersPosted on Categories UncategorizedTags 3d print, photogrammetry
Post navigation
Previous Previous post: Visual Showcase with Briana Marela at Decibel Festival 2015Next Next post: Single Day Game JamAlgorithms and Beauty Proudly powered by WordPress
The Art Institute has a great collection of ancient Greek and Roman art, and if you’re ever in town I suggest taking a look.